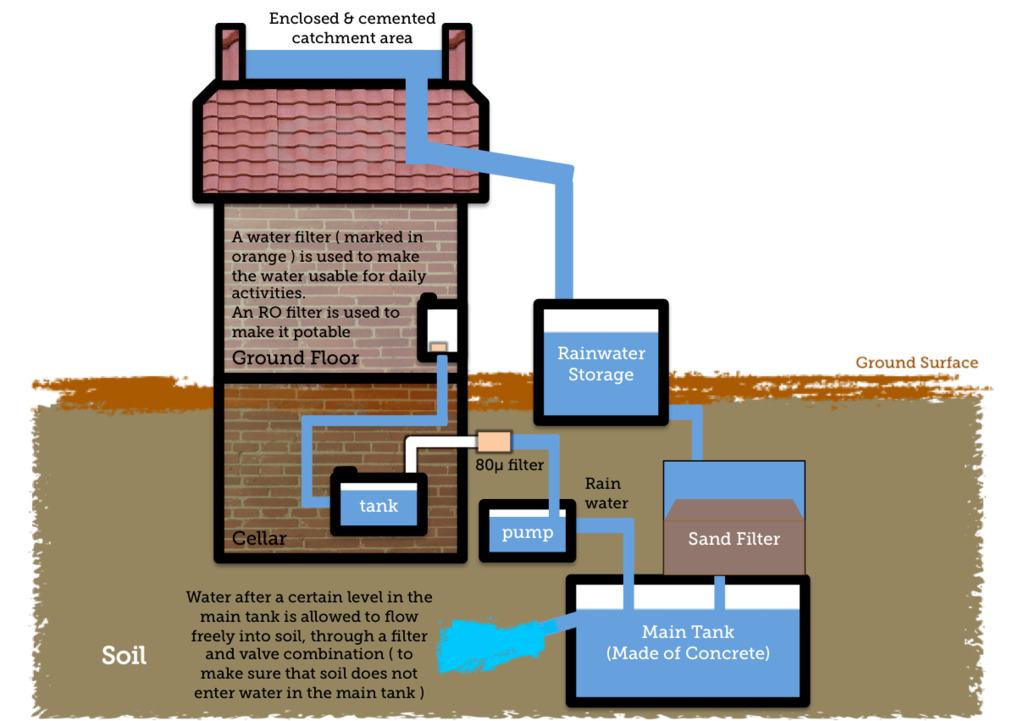
You may have heard someone mention water harvesting and curiosity led you here. Let’s have a closer look at what water harvesting is and how we can use it in our home.
We usually associate the word “harvesting” with the collection of natural resources such as grain, storing it and using it at a later stage so that we don’t lose it. The same can be applied to water that would be lost or go to waste. Water harvesting is therefore the collection of rainwater and greywater that would either soak into the ground or be sent down the drain. This water is then stored in large tanks and used at a later stage. It is a way to recycle water.
What Water can be Harvested?
When it comes to harvesting water in your home there are two types: firstly rainwater; and second greywater.
Rainwater is obvious. When it rains it comes off your roof, and it gathers or flows at ground level around your property. With the rainwater that comes off your roof it will run along the gutters and through the downpipes. You can then channel it into piping that will lead to a storage tank or collection tank. If your tank is sitting on top of the ground you can bypass downpipes and channel it straight into the tank through PVC piping from the gutters.
Greywater is the water that comes from your sink, basin, washing machine and dishwasher. It’s basically water that you’ve used but excludes water from your toilet. There are however some cases where people are using their toilet water and a filtration system and then pumping that water back into the garden.
When it comes to using water in the garden I must say I much prefer to use rainwater. If you have had a dry spell you will notice that as soon as the rain comes, the flowers just flourish, the grass grows greener and it’s much better than using water from your tap. Rainwater has all the nutrients the garden needs.

Storing the Harvested Water
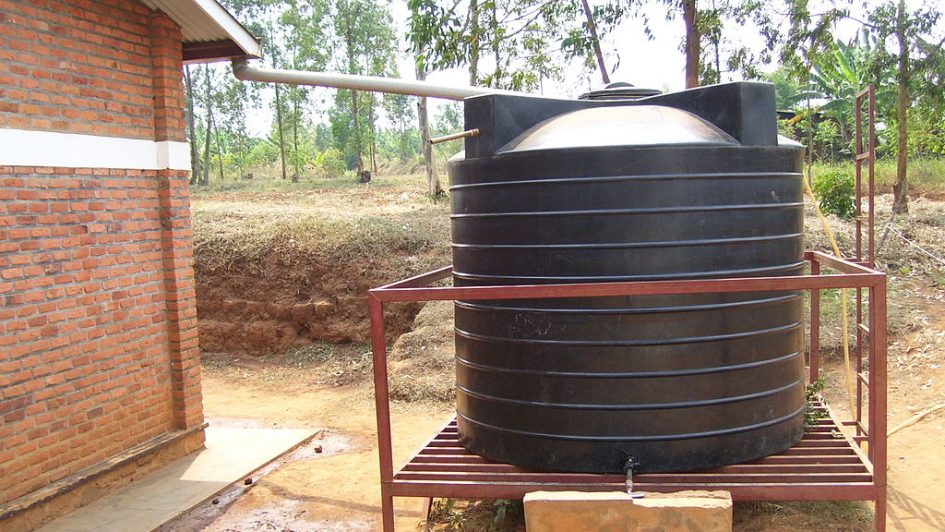
The obvious and by far the easiest is to use a large plastic tank such as a JoJo Tank. These tanks come in various sizes. They range from 260 litres to 20,000 litres. The standard that most people go for a 5,000 litre tank, or two in our case.
At the time of writing this article we are actually in the process of installing two 5000 litre tanks in our garden and before they got the tanks and the piping installed they had dug a hole for each tank. We had a 10 or 15 minute downpour yesterday and the holes were completely and utterly filled with water. Considering that these are 5000 litre tanks I would say that yesterday’s storm would have probably filled both tanks, so don’t think that just because they look so big that you are going to have a struggle to fill them. With the rainwater that you get, trust me they fill very quickly.

Now the question is do you put your tanks on top of the ground level or bury them underground? How about partially buried?
The answer is quite simple really. It all depends where the water is coming from and how much lower the top of the tank needs to be.
Let’s have a look at all three scenarios.
If you are only collecting the water that runs off your roof then as long as the tank you have to collect that water can sit below the line of your gutters, then you can place the tank on top of the ground.
If however you are wanting to collect the water from ground level then the top of your tank needs to be lower than your highest collection point. This factor will determine to what level your tank is to be buried.
If you have a more or less flat property with no steep decline from one side to the other, then you will need to bury it completely underground. If you do have a steep decline where the rain water is flowing from one side to the other then you can bury maybe half way. As said, it depends on the level of the catchment area compared to the level of the top of the tank.
There is however the possibility to have the tank higher than the catchment area, all you need to do is add a pump to get the water up the pipe and into the opening in the tank, this all depends on if you want to bury the tank or not. This is probably better shown with our own tanks. Take a look our own rainwater harvesting project for progress photos.
On the one side we have a steep decline so the tank isn’t completely buried. We have a section of flat roof where the rainwater downpipes are encased in the walls and columns so from the bottom of the downpipe the guys attached a pipe which then goes underground. From the pitched roof section some drains have been included which then feeds that water into the same underground pipe system and then runs down the slope and into the tank. Because the end of the pipe is lower than the collection point, plus the force of gravity and the running rainwater, the water gets pushed up the pipe at the end and into the tank.

Around the back section however we get a lot of rainwater coming from our neighbor who is higher than we are. This water runs around the back of the house and so we are including a drain that collects that water and feeds it into the tank. However the level difference from the collection point to the tank is not as steep so the tank has to be buried a lot deeper.
How to Reuse the Water that has been Harvested
Depending on the system you have installed, you can either use the water for the garden, inside the house, even for drinking water. For this reason it is a good idea to determine what you want to reuse it for before you install your system, or at least make sure that you can adapt it at a later stage.
The safest bet is that you will be using the rainwater to water your garden or maybe fill your pool. In this case you might want to look at connecting it to an existing irrigation system and you’ll need a tap. The connection to the irrigation and the tap itself will need a pump in order to pump water through, but this is your basic water harvesting system.
What you can also do is take the water from the tank and use it to fill your toilet cisterns.
Because the water hasn’t been filtered these are the only areas that you can actually use it, however if you do have a filtering system you can then pump it back into the house. Use it to fill your geyser, pump it through your taps and into your cisterns. If it’s a good filtration system then you can also use it as drinking water. This allows you to completely remove yourself from the grid as far as water goes.
Of course there is always the issue that you have a dry season or during the period of the year when it doesn’t rain, in which case you’ll probably use all the water in the tank. It’s always a good idea to make sure that the system is also connected to the municipal or government water supply so if the tanks do become empty then you have your backup and can switch it over.
There are also systems which we will speak about in other articles that are groundwater recharge systems and these use things like recharge pits also called percolation pits or absorption pits and it’s basically to recharge the groundwater during a dry spell or to recharge a borehole which has dried up. This type of system is not often used within the home because it requires a lot of setup but if you find it necessary and you do have the space then it might be a good idea to include it.
As I said, the recharge pits system I’ll talk about in other articles and I will also speak about water harvesting in small areas such as including a water harvesting system in an apartment or small gardens. There are solutions everybody can use to harvest water. There’s no specific requirement for it.


 I currently live in South Africa and we have recently started putting a rainwater harvesting system into our garden. I find the topic amazing and have done a lot of research with more to follow on different systems and even DIY options. I hope to share them all here.

